Although it may not technically be summer anymore, we’re using up all the leftover summer fruits and veggies that need their last hurrah!
August meant a sweaty AC at full blast and an excuse to eat endless amounts of ice cream. Oh, but my sweet tooth didn’t stop there. I had my eye on all the peaches, nectarines, plums and berries strewn about the market. Where did my mind automatically go? Pie!
I thought it was about time WWE did some baking. Plus, what better way to turn our attention away from the beating hot sun and toward one of the season’s best assets, fruit! An excuse to spend the morning at a farmer’s market with Rian wasn’t bad either.
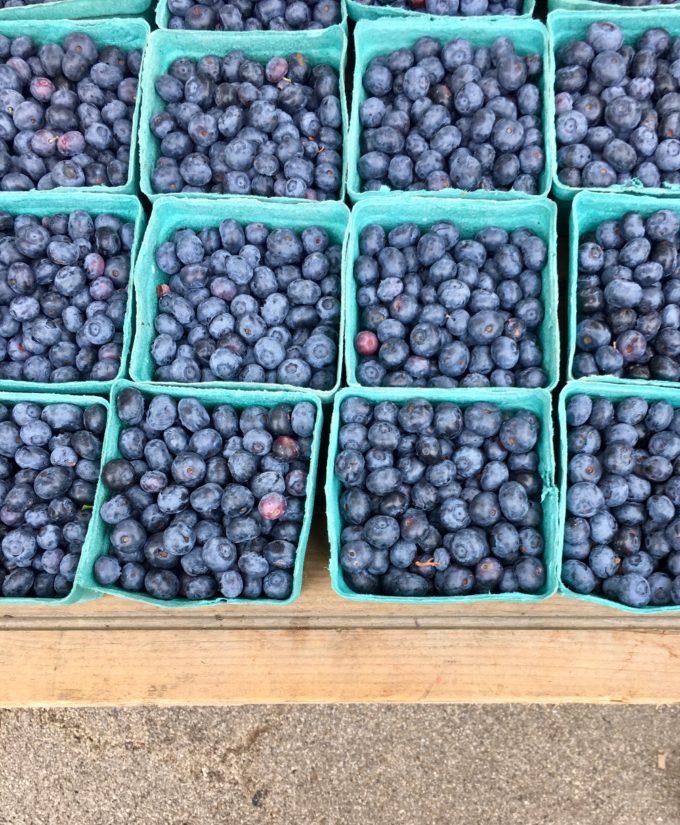
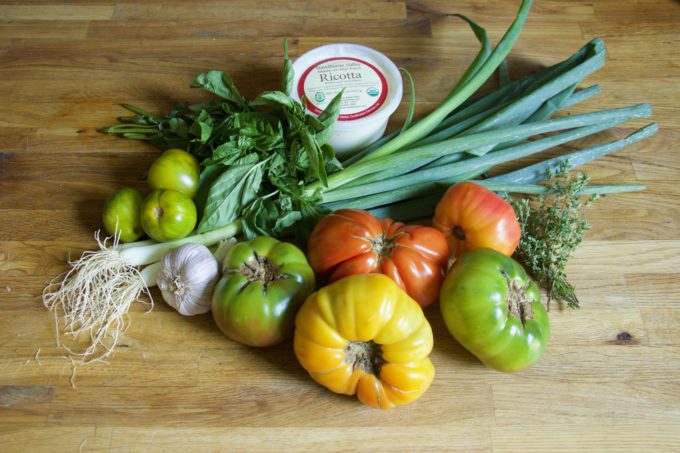
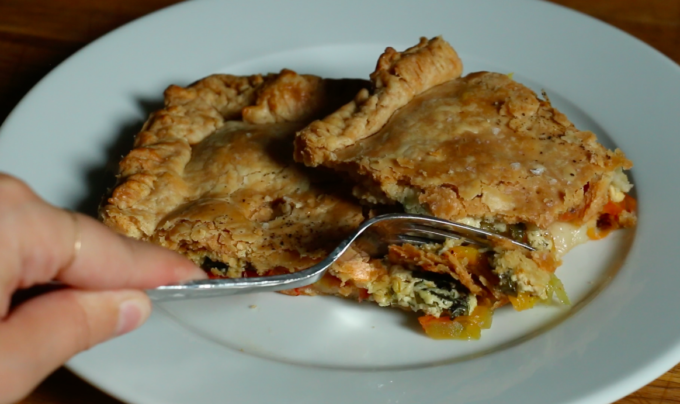
We indulged in the juiciest peaches and two full pints of plump blueberries to fill up our first pie. And there was no way we were going to stop there. The table of 10 different kinds of tomatoes beckoned us and we couldn’t resist. Mesmerized by the abundance of veggies, we couldn’t bare pass them up! Suddenly, we knew what we had to do; we had to make a second pie! The wheels in Rian and my head started turning and we jutted around from farmstand to farmstand raiding tasting tables with toothpicks and sniffing bundles of herbs. Savory was, undoubtedly, our forte and the possibilities were endless! We landed on a tomato pie with fresh ricotta we would mix with a narrowed down collection of herbs (thyme and basil) and garlic.

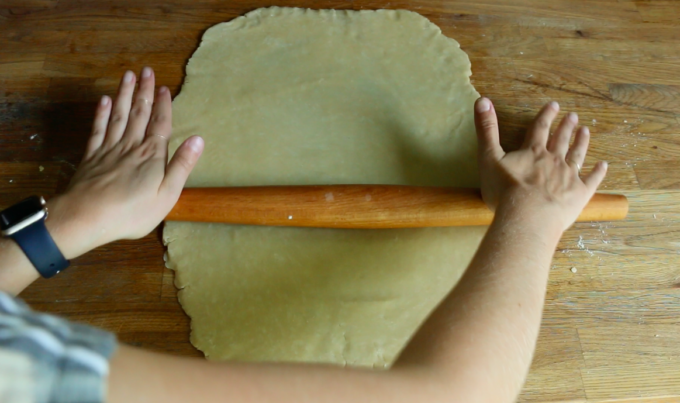
The average piecrust is made up of butter, flour, salt, sugar and water. There are always those folks who think lard is the rule of thumb, but at the end of the day, it’s whatever you’re used to. There are others that get nervous around pie dough. Is the butter too soft, is the water cold enough, did I work it too much? Trust me when I say, there’s a reason people say, ‘easy as pie’. Indeed the crust part of the whole thing was pretty simple; only problem was that I didn’t have a food processor. In all my years, I’d never actually used one to make piecrust. I’d only ever seen my mom do it by hand and I actually enjoy it that way. So, when I set out to make slab pies, I wasn’t sure I would find this method as charming. My boyfriend spent the evening watching me make three (just incase) piecrusts from scratch with my hands. He thought I was crazy, pounding cubes of frozen butter with a whisk looking thing (pastry cutter). Then I showed him a YouTube of the “knife-method”. Now that’s crazy!
For these slab pies, I used Martha Stewart’s pie dough recipe x2 (cause that’s what Laura uses). It’s all butter, a little gooey and flakey in all the right places. The key is adding just enough water. Once the butter and flour mixture mimics a damp sandy texture, add in just enough water so that when you pinch the dough it sticks together just enough. You know you’ve added too much water when the dough starts to feel or look like cookie dough. In a food processor this happens really fast so stick to quick pulses.
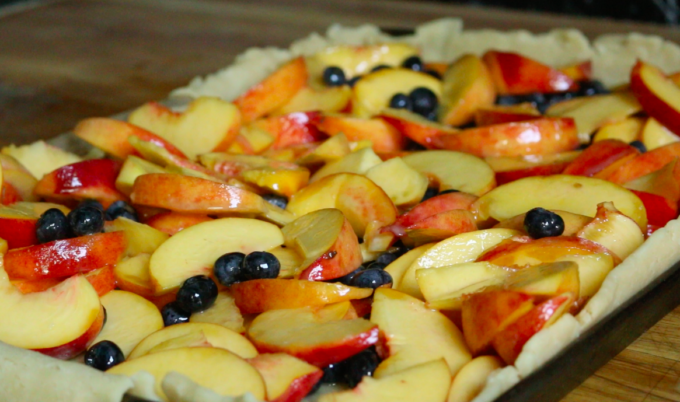
For the fillings we went with a universal sugar mixture that can be mixed in with just about any fruit your heart desires. The same one we use at Copper Beech (one of our best sellers). As for our savory experiment we picked an assortment of heirloom tomatoes, scallions the size of Rian’s head and sweet ricotta with herbs and garlic of course.
The slab-pie, the American cousin to the Galette and forefather to the pop-tart is made with two regular 9×12 sheet trays, a rolling pin, a sheet of parchment and a fork. Roll the dough out until it’s a little larger than the sheet tray. We like to fill two sheet trays, top and bottom to make it easier to assemble later. If there are some missing spots or tears, don’t worry; you can patch them up with the excess overhang. Once they’re rolled out add your filling and flip the top crust over top. Crimp the edges and use a fork to imprint along the edges. It’s important to remember to poke holes in the top layer for ventilation. We also like to sprinkle it with cream to ensure a beautiful golden crust but you can finish with any sort of glaze you like. For a sweet pie we recommend a sprinkle of turbinado (sugar in the raw) and flakey maldon salt and pepper for a savory.
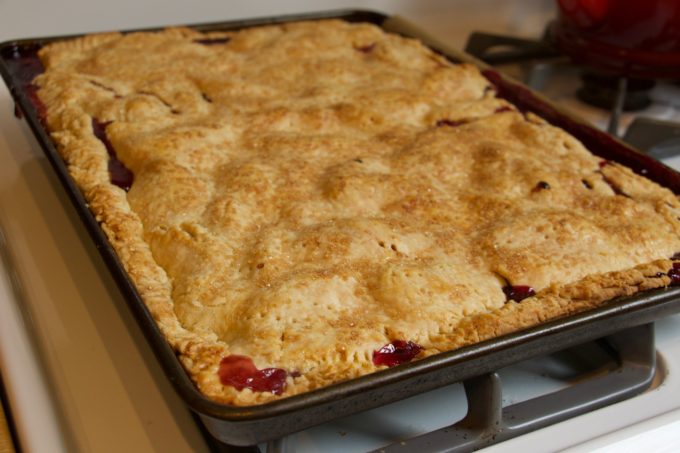
Bake until the crust is golden. There might be some over-flow. This is totally normal and adds a little homemade personality. We recommend keeping a clean sheet tray on a lower rack to catch spills. For a sweet pie, allow it to cool for at least 15 minutes before serving (with a heaping scoop of ice cream, of course). For savory, it’s safe to serve straight away! Yummmm! Pie for dinner and dessert perhaps? Too much? Nah! I’ll be concocting winter squash pies in no time!
Dough (Martha Stewart’s recipe)
5 cups AP flour
2 tsp sugar
1 tbsp kosher salt
2 cups (4 sticks) butter, cut into cubes
1 cup ice water
Sweet Filling
6-7 cups fruit of choice sliced into bite-size pieces
1/2 cup white sugar
1/4 cup brown sugar
1/4 cup cornstarch
zest of 1 lemon
juice of 1/2 lemon
pinch of salt
a dash of cinnamon (optional)
Savory Filling
6-7 cups sliced heirloom tomatoes, sliced
1 1/2 cups ricotta
1/4 cup sliced scallions
1/4 cup chopped fresh basil
2 tbs. fresh thyme, minced
zest of 1 lemon
2-3 cloves garlic, minced
1 tsp. salt
1/2 tsp. fresh ground pepper
Olive oil
To Finish
2 tbsp heavy cream
2-3 tablespoons Sugar in the Raw or (for savory) Maldon salt and fresh ground pepper
Method
To make dough: In Cuisinart, process dough’s dry ingredients. Once incorporated, add in butter cubes and pulse until broken up and flour looks sandy. Now, with the motor on, slowly drizzle in ice water. Stop the second the dough begins to come together. Dump onto clean work surface and knead 3 times until flour is just incorporated. Wrap tightly in plastic wrap, gently smoosh into the rough shape of a rectangle (this will make your life easier later on) and refrigerate for at least an hour and up to 3 days.
For the sweet filling: Mix all ingredients together. Voila. Do this right before you’re going to bake your pie so it doesn’t get too runny.
For the savory filling: Lay heirloom tomatoes evenly in one layer on the surface of the dough. Then mix the following ingredients until well combined and sprinkle on top of the tomatoes. Finish with a glug of olive oil and salt and pepper to taste.
To form and bake slab pie: Preheat oven to 375 degrees. Remove dough from fridge about 30 minutes before you’re ready to work with it. Slice dough into two pieces, one about two-thirds of the dough, the other about one-third of the dough. The fact that you wrapped this in the shape of a rectangle should help make this and rolling it out as a rectangle a little easier.
On a floured work surface and with a rolling pin, roll the bigger slab of dough out into a rectangle a little bigger than a 15×10″ sheet pan. You want to be able to fold excess dough over to create the outside crust. Don’t be scared, it doesn’t have to be perfect. Move the dough and add more flour to your work surface as necessary to prevent sticking. Once you’re there (or as close to it as you’re going to get), transfer the dough to the sheet pan. Roll out the second slab of dough to approximately fit the top of the pie in a similar fashion.
Add filling to the slab pie, then lay the second sheet of dough over the top. Fold the bottom layer’s excess dough over the top and either pinch or crimp the two dough slabs together. Next, brush the top lightly with heavy cream, poke it all over with a fork and generously shower over the raw sugar and malden salt.
Into the oven is goes for about an hour. Check it after about 50 minutes. If the top is nicely golden, you’re good. I like to err on the side of well-browned versus just-bronzed, but that’s up to you.
Enjoy with vanilla cream!
Sweet pie dreams!
Charlotte