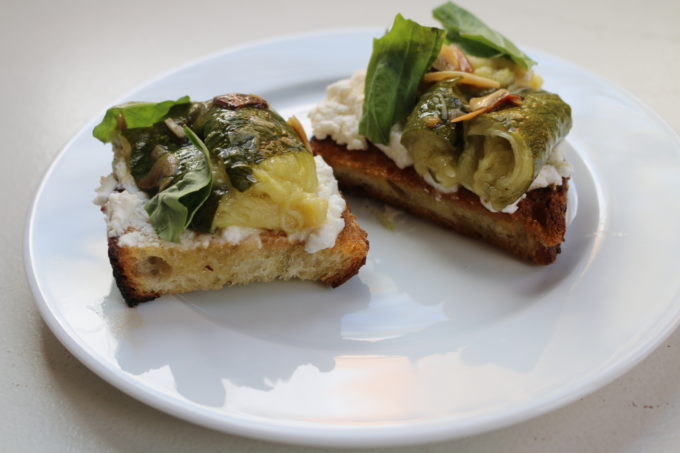
Now that the weather is a bit cooler, slow roasting vegetables is my ideal type of weekend prep – a couple of sheet trays loaded with barely prepped produce, an oven set to a low temperature and a long cooking time that leaves little room for error or need for attention. Slow roasted vegetables are luxurious in texture and intense in flavor. Almost all vegetables can be cooked this way (though maybe not the potato family) and can be used in a multitude of dishes. I’m sharing how I used four of them below.
Continue reading “SLOW ROASTED VEGETABLES AND HOW TO USE THEM”
TWICE BAKED SWEET POTATOES WITH TAHINI YOGURT AND POMEGRANATE
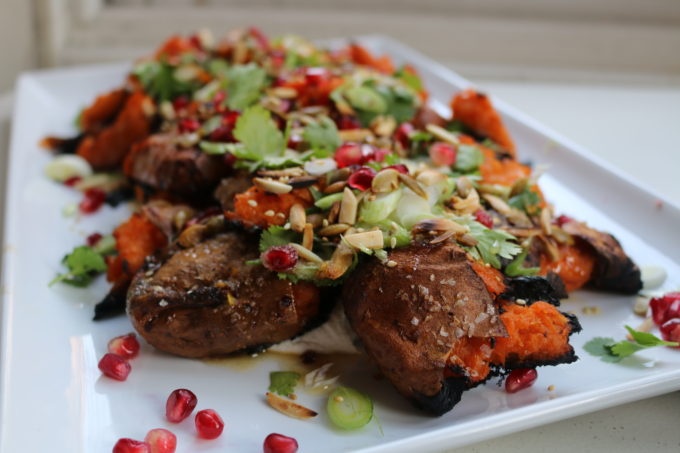
There is a lot of inspiration behind this dish. This picture on Sprouted Kitchen’s Instagram sent me on a hunt for Bon App’s method of twice baking these crispy, irregular shaped potatoes. Rather than pairing the butter/honey/cider vinegar bathed beauties with coconut yogurt and harissa like Sprouted Kitchen, I piled them on a generous bed of tahini yogurt and finished them off with a mix of herbs, nuts and seeds. I’ve made this dish countless times, a rare testament to how good it is. The recipe is long but not nearly as hard as it looks.
Continue reading “TWICE BAKED SWEET POTATOES WITH TAHINI YOGURT AND POMEGRANATE”
A Guide to Squash: How to Choose and Cook Gourds
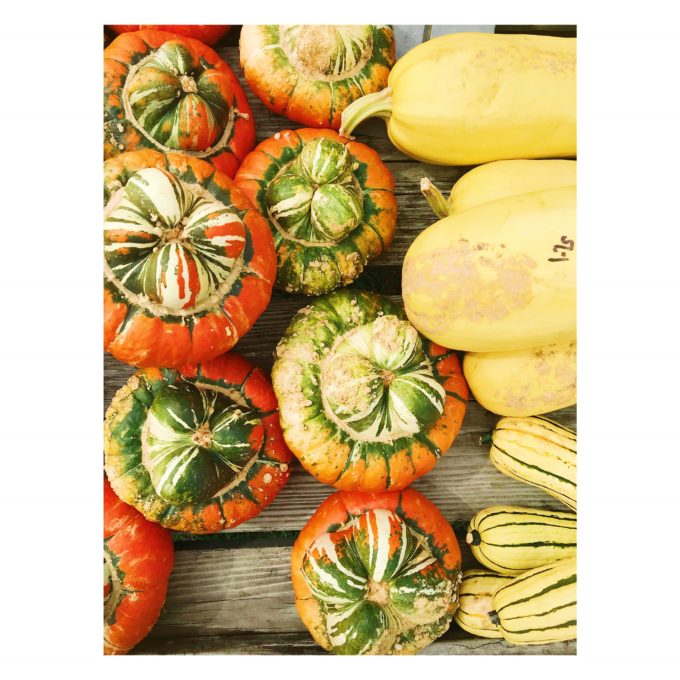
If you’ve walked around your local store you can’t help but notice a few things: pumpkin spice everything, halloween candy, and squash! I’d love to do a guide to the best halloween candy but that’s for another day. I’ve compiled a guide to help you determine which squash is best for your recipe and exactly how it should be cooked. The cool thing about these fall and winter gourds is they last a really long time, like six weeks to even a few months. And guess what? They’re technically fruit because they have seeds! Let’s get started.
Continue reading “A Guide to Squash: How to Choose and Cook Gourds”
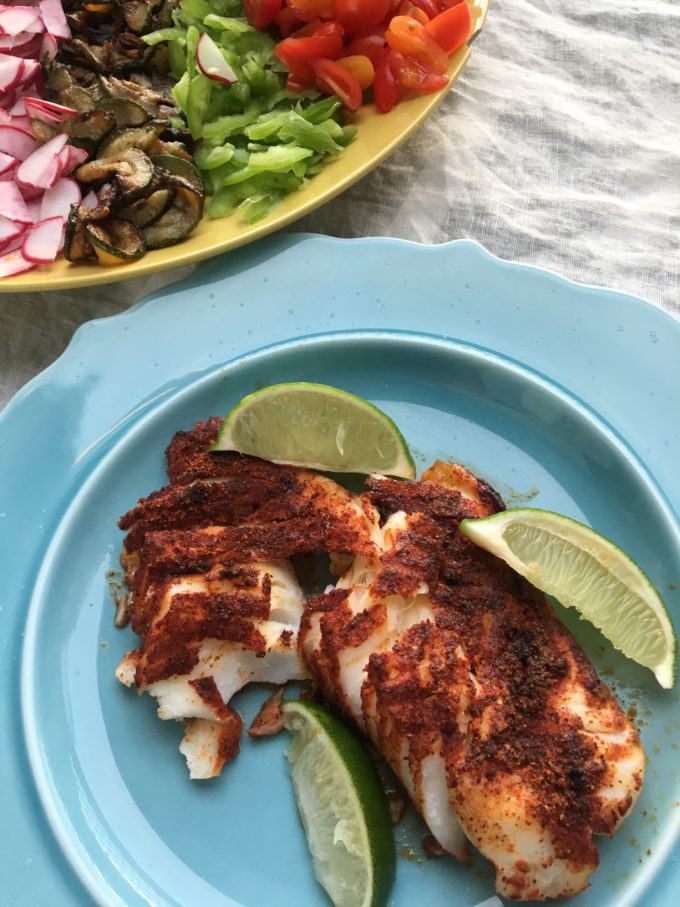
Get to Know It: Smoked Paprika

I can’t think of a single smoky-flavored food I don’t love. Smoked salmon and trout, all manner of BBQ, bacon…but living in Brooklyn with outdoor cooking prohibited and a sensitive fire alarm makes achieving that flavor with fire nearly impossible. Enter: smoked paprika.
I first added this spice into my culinary repertoire about five years ago when making David Tanis’ Pimenton Roast Chicken with Crispy Potatoes. To be honest, before this recipe I shied away from most dishes with paprika. I’m not sure why exactly. Probably because the only paprika I tasted growing up was a generic supermarket brand that had been sitting in the back of my parents’ spice drawer for years. I thought paprika was a spice that added a red hue but not much else to a dish. Boy, was I wrong.
Tanis’ crisp-skinned roast chicken had a depth of flavor I didn’t know was possible without open-fire cooking. It was garlicky, a little bit spicy and with a deep smoky aroma. With the success of this recipe, smoked paprika quickly inherited valuable real estate in my spice rack.
This spice is made most often in Spain where ripe red chile peppers are dried slowly over smoldering oak for up to two weeks before being ground into the powder we find on market shelves. Other aliases include pimenton, smoked pimenton, and Spanish paprika. The second you take a whiff, you’ll know you have the right spice. You can also find it at varying levels of heat, from sweet (dulce) to spicy (picante). I like all of them so that’s just a matter of personal preference.
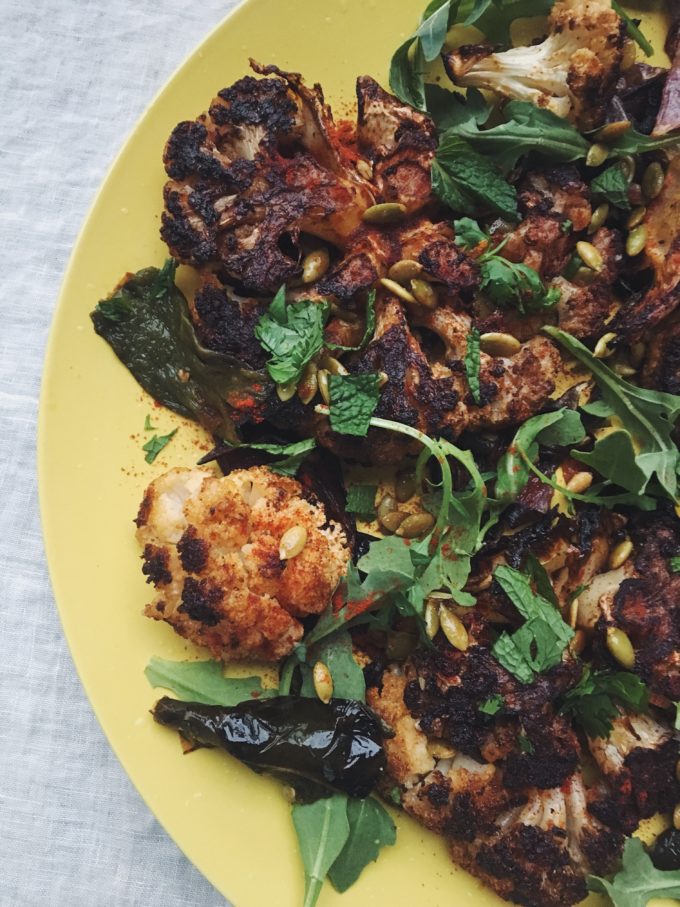
Below are several favorite ways to use smoked paprika in cooking. This is a spice you can be quite heavy handed with, so don’t be shy. Give one or two of them a try and I promise you’ll be hooked.
On vegetables – sprinkle over roasted or grilled corn, cauliflower, sweet potatoes,
In vinaigrettes – add a pinch or two to a mix 50/50 mix of lime/olive oil (add a touch of honey or agave too, and of course salt and pepper to taste)
On proteins – sprinkle over fried eggs, season a mild white fish like halibut with it for fish tacos (use cumin too), use it on any poultry, or even use it as your secret ingredient in burgers
On pepitas – when toasted pumpkin seeds on the stovetop, add a little olive oil, salt, and smoked paprika for the last few minutes of toasting
On legumes – fry chickpeas in olive oil on the stovetop for about 10-15 minutes until crispy, adding a generous pinch of smoked paprika for the last few minutes and then finishing the whole thing with a squeeze of lime juice
With love always, Laura
All You Need to Know About Pork Tenderloin
Currently sitting at my favorite neighborhood patisserie – nibbling on the best chocolate almond croissant in Park Slope (Colson at the corner of 9th and 6th ave) – piecing together the clips of my first totally solo video project. And it’s starting to feel like a mining operation: pealing away the jumbled parts of my 3-hour, single-take, cut-less footage and jerky tripod adjustments – a testament to the importance of asking for an extra set of hands. However, my favorite part of this whole process of making these videos has been the challenge of putting my film schooling to practice in this new food video domain. It’s not perfect and my standards are much too high but it’s really fun. I love the process of demonstrating a process. Food is a process. It’s practice and it’s putting your knowledge of ingredients and tools to the test. Sometimes it doesn’t turn out the way we envision but when it does the process of getting to that point makes you feel like an expert the next time around. Being confident and accepting the process is the key to success.
This video came about because some folks commented on one of our pork tenderloin Instagram posts, professing their frustration with pan-searing pork and that it never looks like “that”. But, I’ll be honest, neither did mine. It took me a few tries and lots of deep breaths to get it right. Laura and the crew would probably say it was my biggest hurdle. But I’m here to tell you that it is possible! Here are a few tips I picked up in the process 🙂
- Prepping a pork tenderloin:
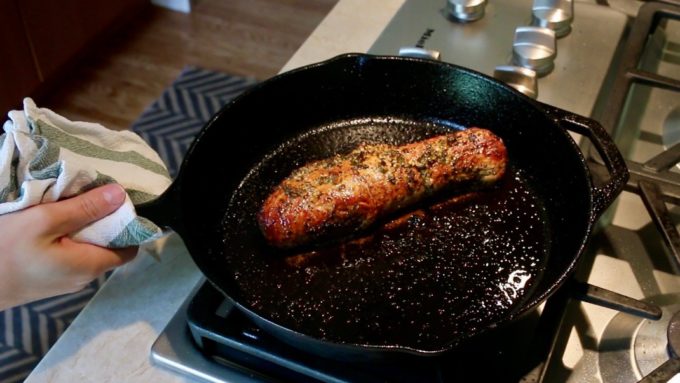
- Pork is best seared, to get that crispy, unctuous crust, then popped in the oven at 425 degrees to finish.
- First, you must trim off something called the “silverskin”. According to my research, “silverskin is connective tissue that doesn’t dissolve when the tenderloin is cooked, so it needs to be trimmed away” (finecooking.com). Hold it tightly with your fingertips and stick a sharp knife, preferably a boning knife or pairing knife, through to make a thin slit and follow the tissue until it’s removed.

- The longer you marinate, the better.
- Next, it’s important to marinate the tenderloin for as long as possible, at least an hour. Although, we all know apple and pork is a winning combo, pork is also great with almost any citrus. Pork absorbs flavors beautifully. You can adjust your seasonings to go along with whatever you’re making.
- Make sure you strip the pork of excess marinade before you start searing but don’t pour it down the drain just yet! You’ll use it later. You can also add a little something extra to the marinade after you’ve stripped it like honey or agave, sriracha, anything that is likely to burn in the pan while it sears. We added honey to the recipe in this video and created a sweet glaze.
- (Bonus tip: you can also make extra marinade before you add the pork to use as salad dressing!)
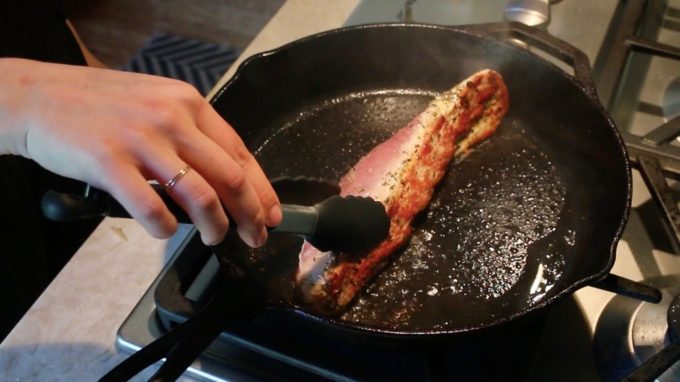
- How to get the perfect sear every time:
- When you’re searing pork, or anything for that matter, you want to make sure your pan is really really hot. You can test this with the water splash test, if it sizzles you’re ready to go. Add the oil. This can be anything you have laying around but if you’re getting really technical, you’ll want something with a “high-smoke-point” (things like grapeseed oil, safflower oil or canola oil). Make sure it covers the whole surface of the pan, then carefully layer the meat on top. It will splatter so watch out!
- You’re going to create an even sear around the whole tenderloin so it’s crispy all the way around. To do this, you’ll roll the pork toward (or away) from you, allowing the pork to get a nice sear on each roll. On the last roll just turn, spread with your excess marinade or glaze and pop it in the oven.
- Finish it off in the oven.
- Oven timing is tricky here because oven temps vary, pork girth vary, and different pans transfer heat differently. Before you give up, there’s an easy solution. Welcome meat thermometer! Check the pork after about 6-8 minutes. Stick the thermometer in the thickest park of the meat. You want it to read 135-140. It will finish cooking while it settles.
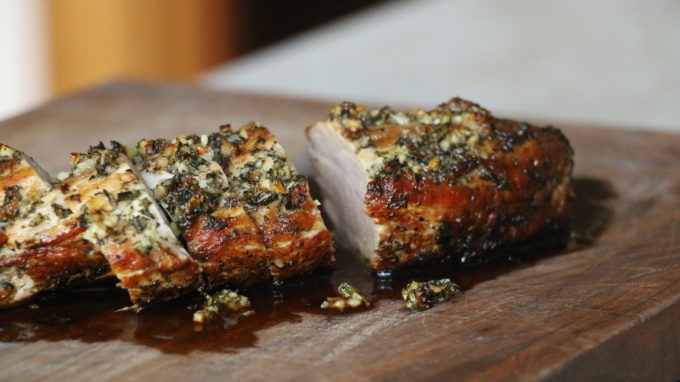
- Let it rest!
- Probably the most important tip we can give you is to let it rest. Make sure the pork rests for at least 10 minutes – just enough time to whip up your salad or strain your rice. This will ensure juicy pork. Even if you think you overcooked it, it will still be delicious and juicy if you allow the meat to rest.
- Save le jus.
- The final tip I have is to pour the juices that pool on your cutting board over the meat. It’s a trick I learned long ago and will never serve meat to another living soul without it. Perhaps the simplest way to transform a piece of meat into a savory chef-d’oeuvre.
Our go-to pork marinade ingredients and pairings:
As shown in the video:
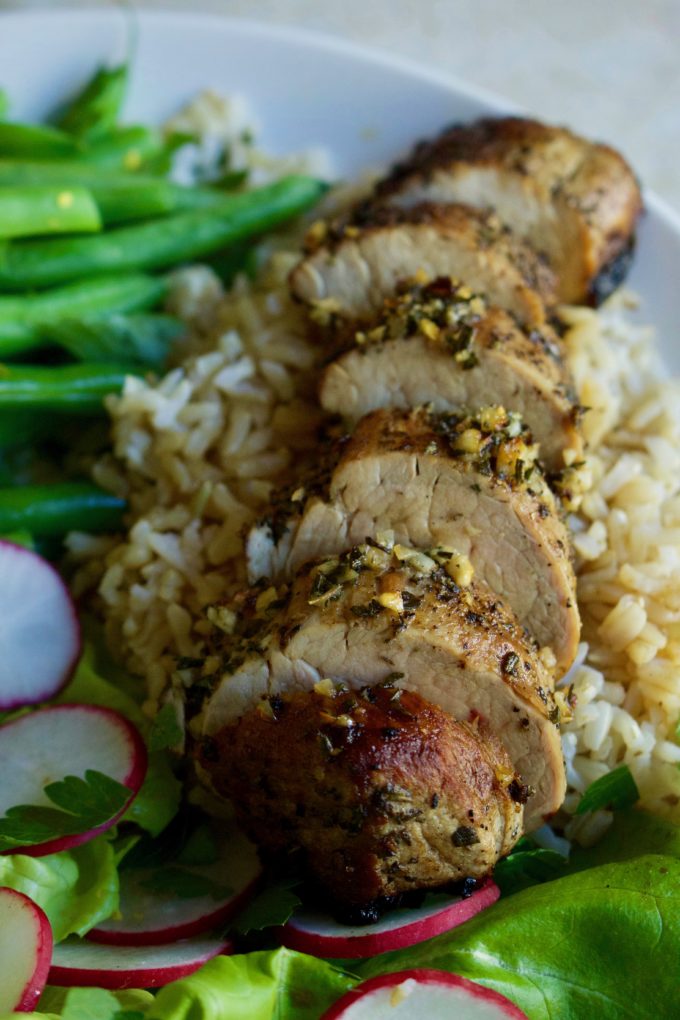
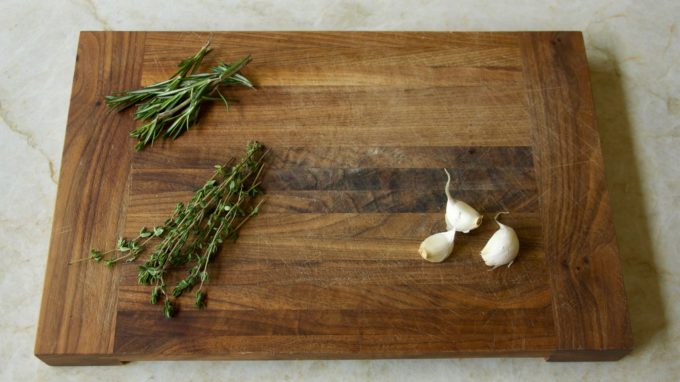
- Roasted pork tenderloin with lots of fresh thyme, rosemary, garlic, salt + pepper and honey to finish.
- Paired with delicate Boston lettuce, shaved radish, lightly blanched green beans, and brown rice with a lemon-dijon vinaigrette
- Roasted pork tenderloin with orange zest, garlic, grainy Dijon mustard and honey to finish
- Paired with roasted sweet potato wedges, quinoa and simple arugula salad with citrus Dijon vinaigrette
- Laura’s Cooks vs. Cons pork tenderloin: http://whatweeat.nyc/cooks-vs-cons-behind-the-scenes/