Weeknight Gochuchang Noodles

I post noodle recipes like this a lot because they are workhorse dinners in my home. I always have my freezer stocked with Kaedama noodles by Sun Noodle (@sunnoodles) and shelled edamame, and reliably have baby cucumbers (a staple for my kids) and other hearty vegetables like carrots or radish here in my refrigerator. It’s perfect if you stop here but you can also serve it over a pile of baby spinach and top it with jammy eggs if you want more.

If you don’t have a well stocked Asian pantry, simplify the dish by dressing the noodles with a few tbsps soy sauce and rice vinegar or lime juice, and a tsp or two of toasted sesame oil. Still totally yummy.

Everything comes together in the time it takes the water to boil for the noodles. Hope you enjoy it as much as my entire family does!

Continue reading “Weeknight Gochuchang Noodles”

WILD MUSHROOM AND FARRO VEGGIE PATTIES

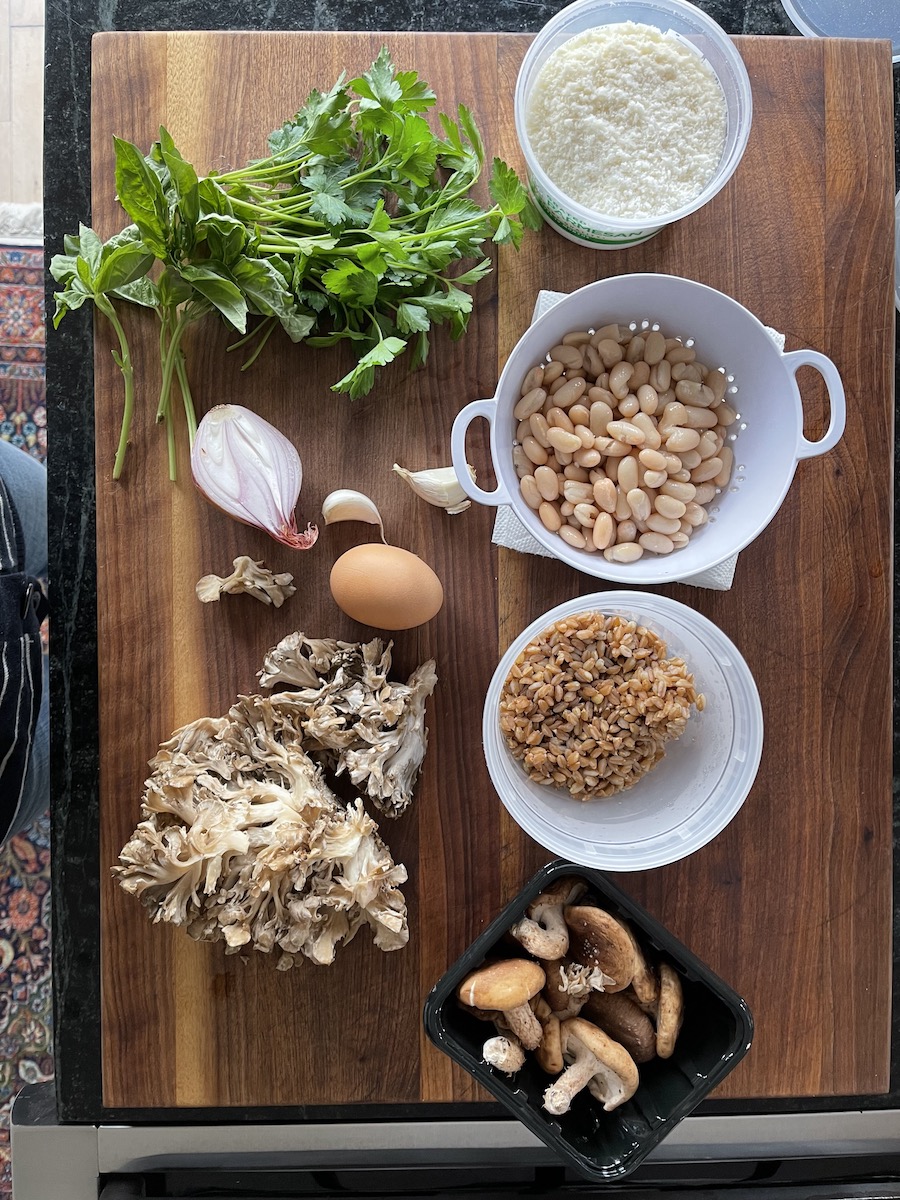
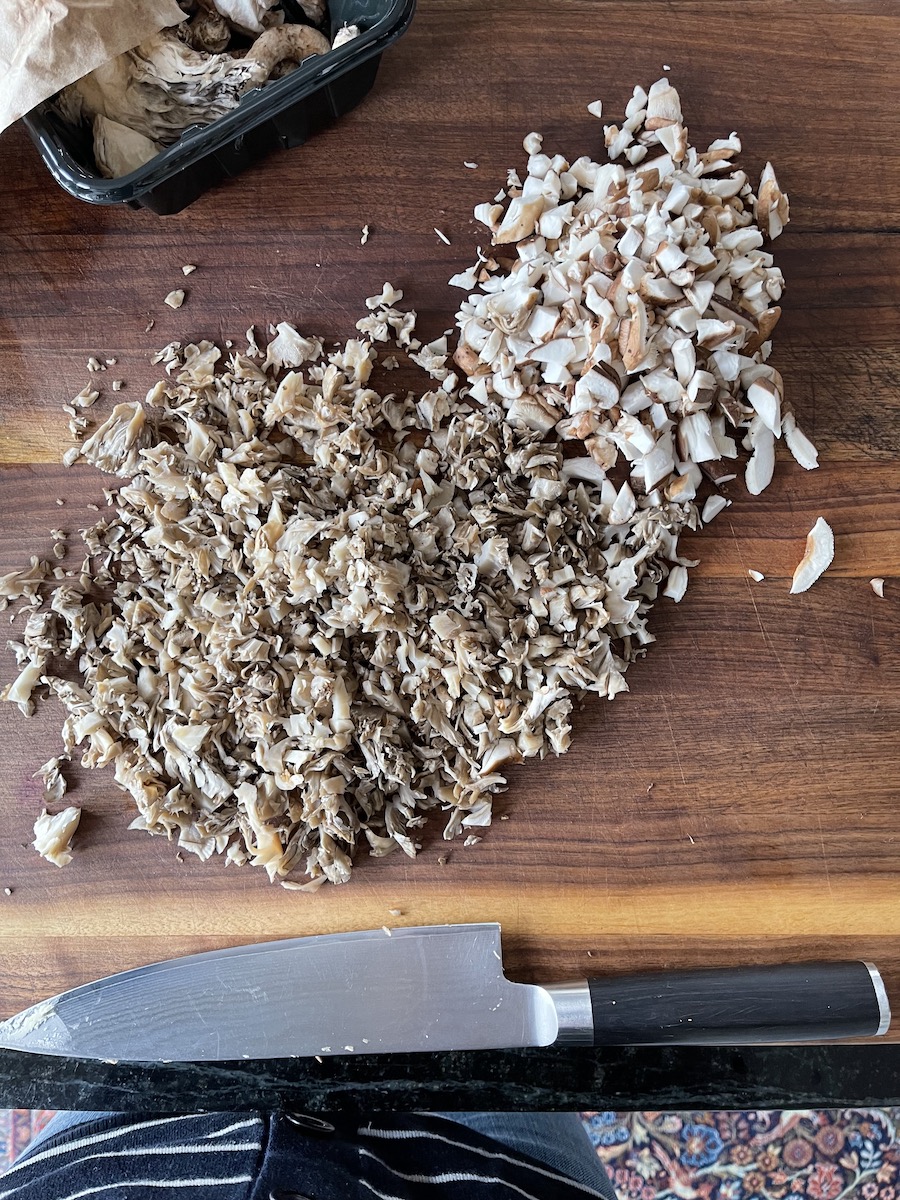
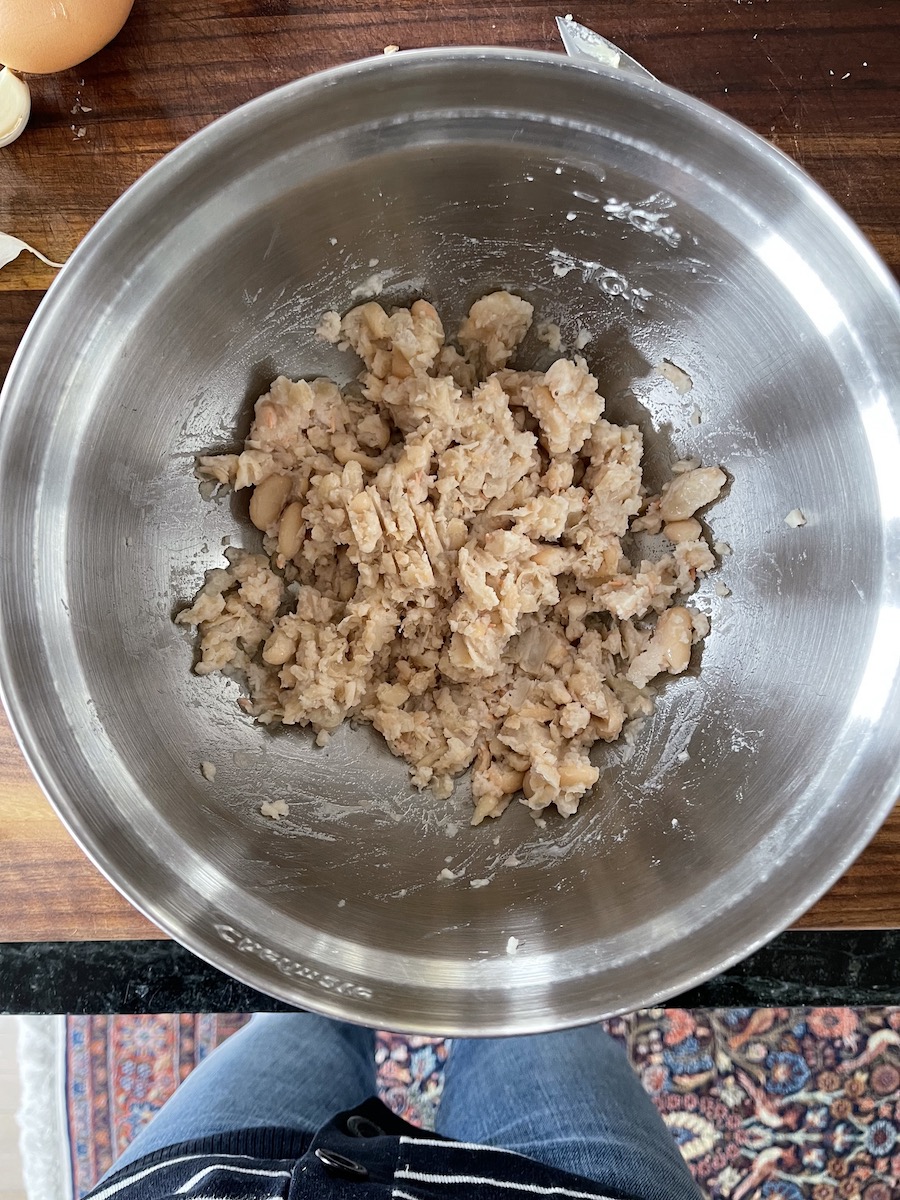
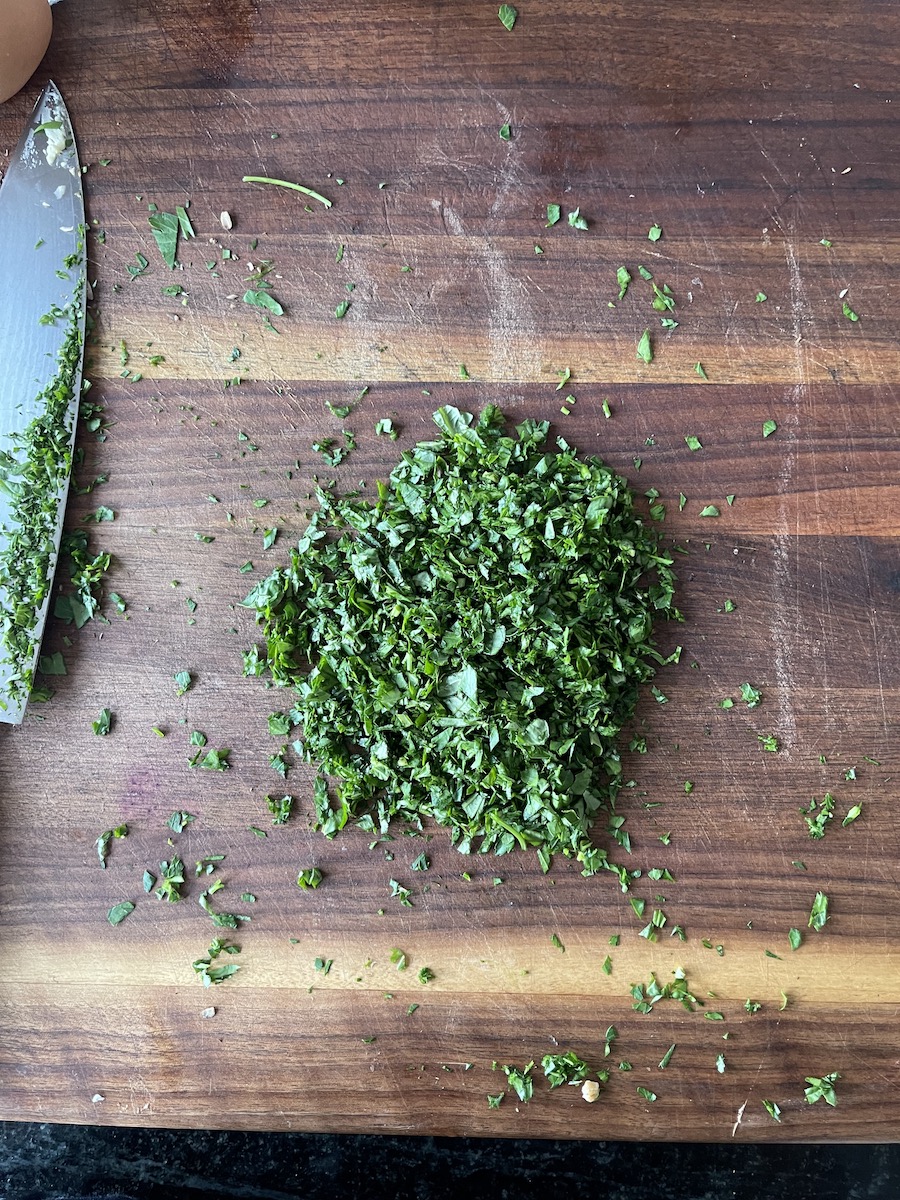
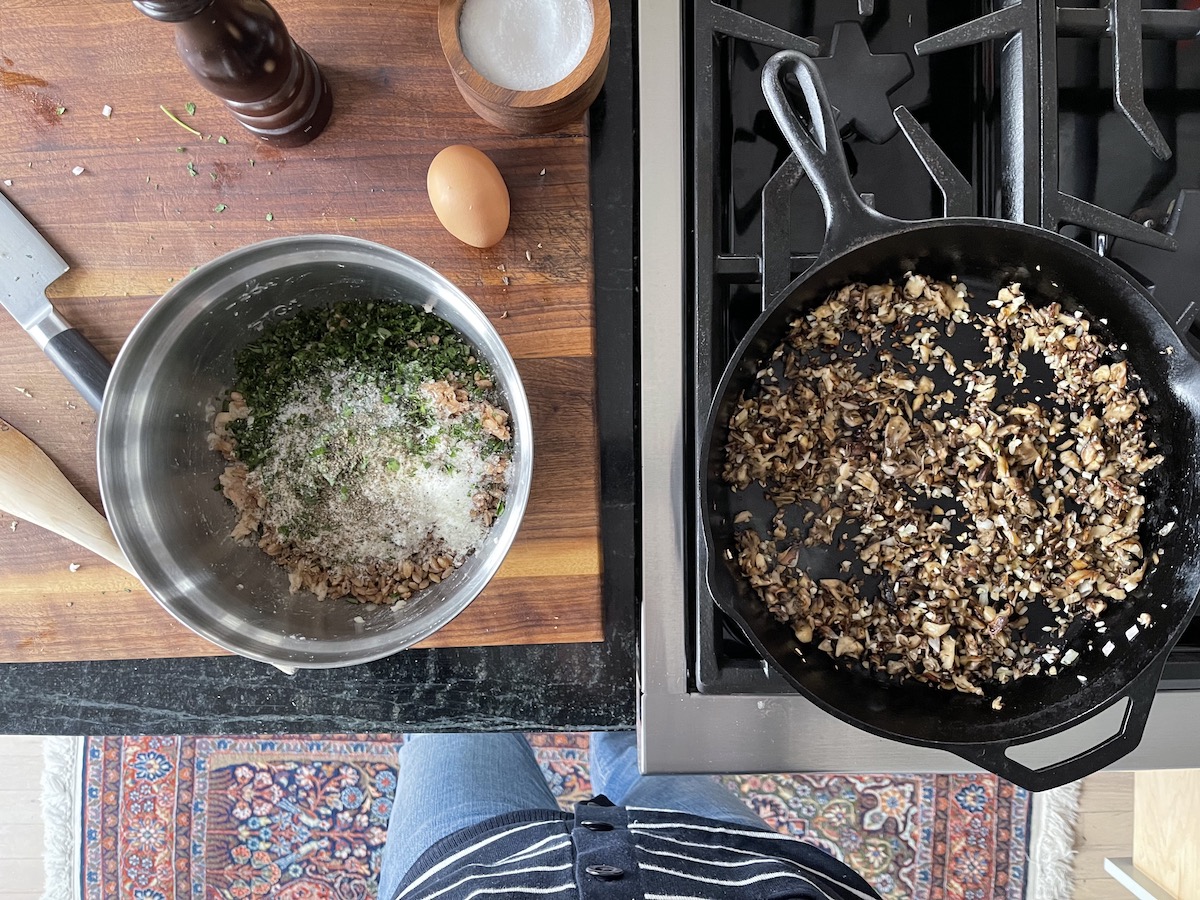
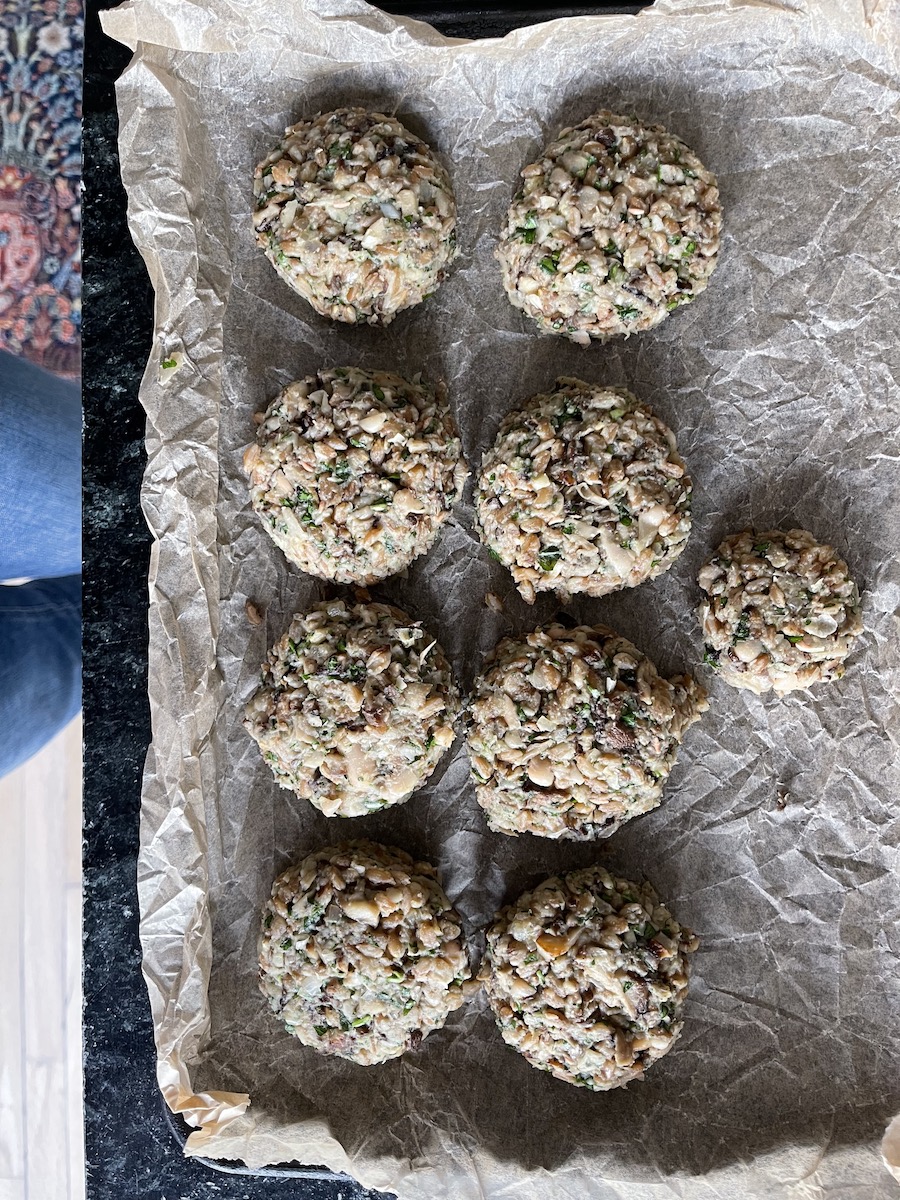
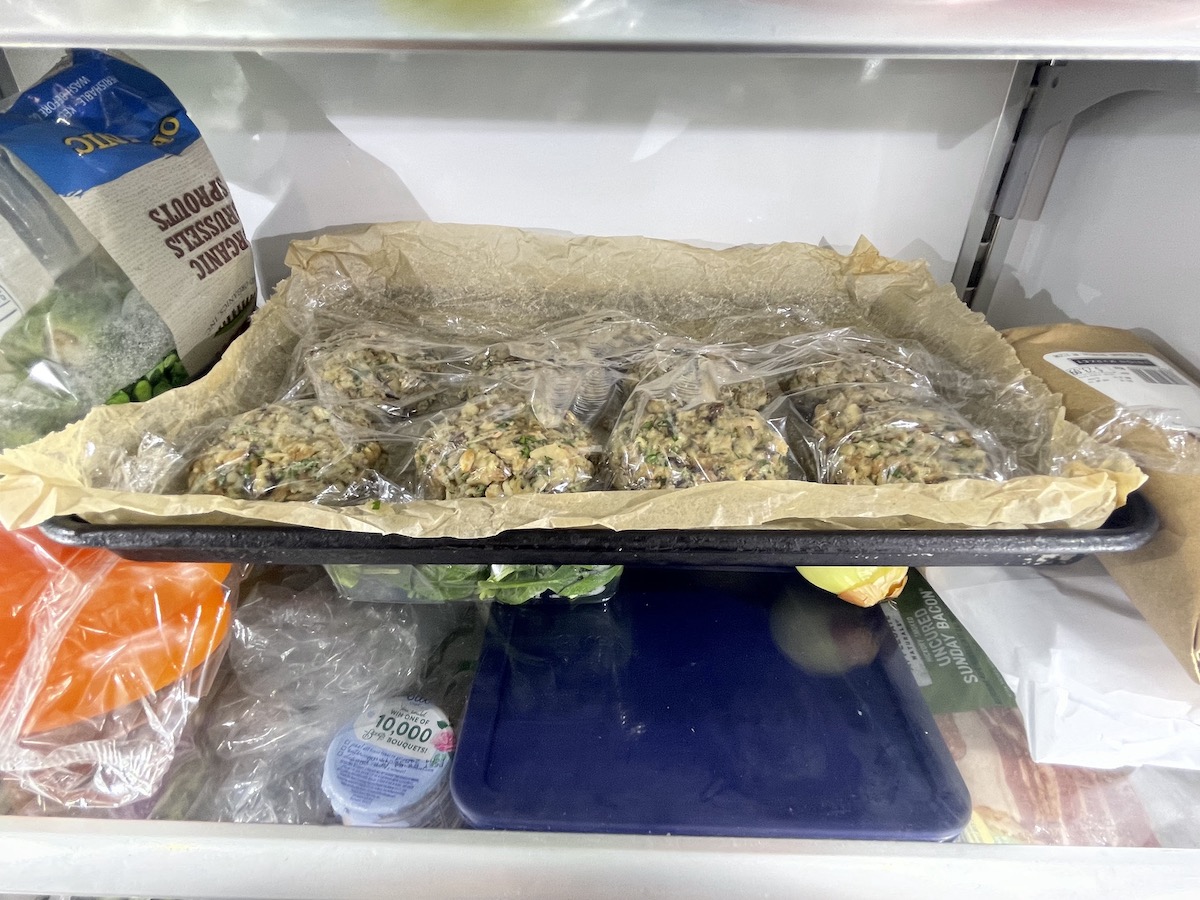
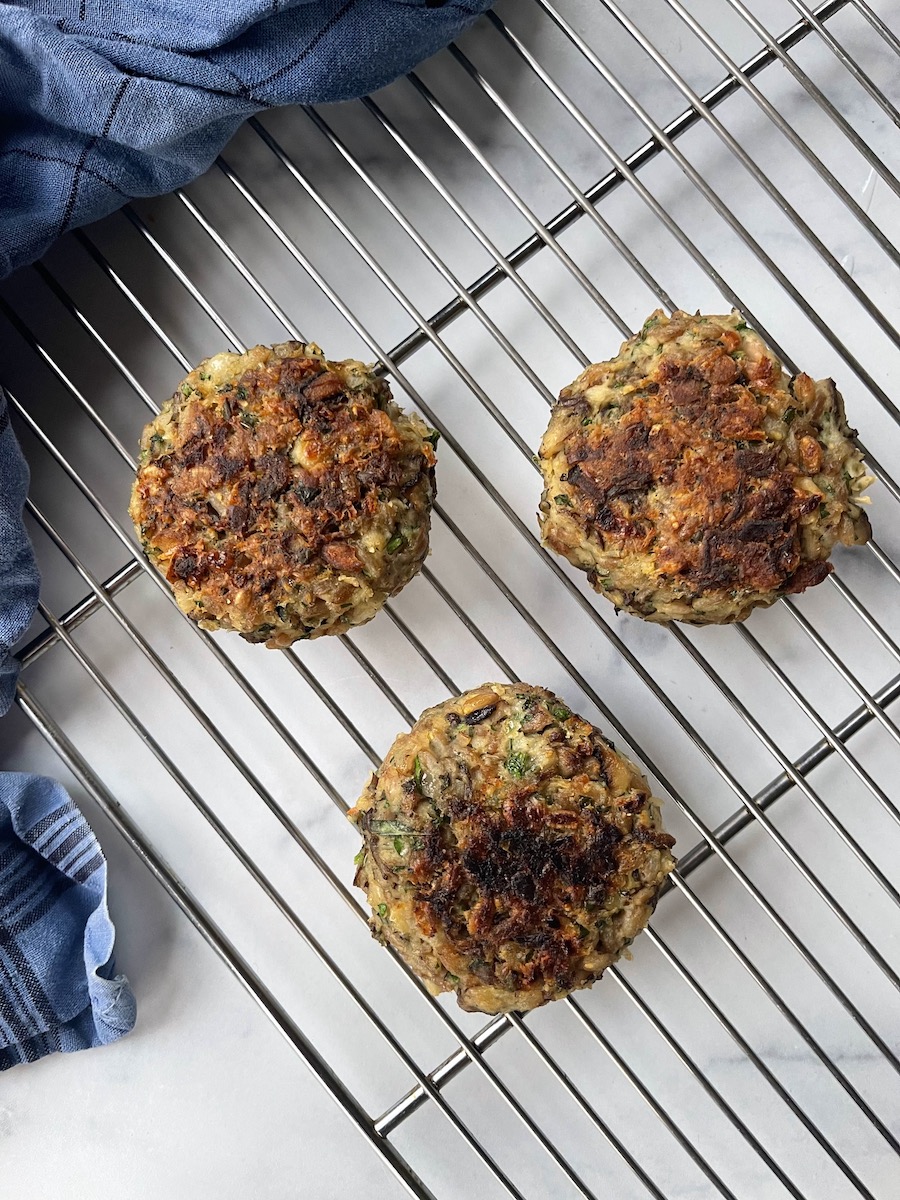
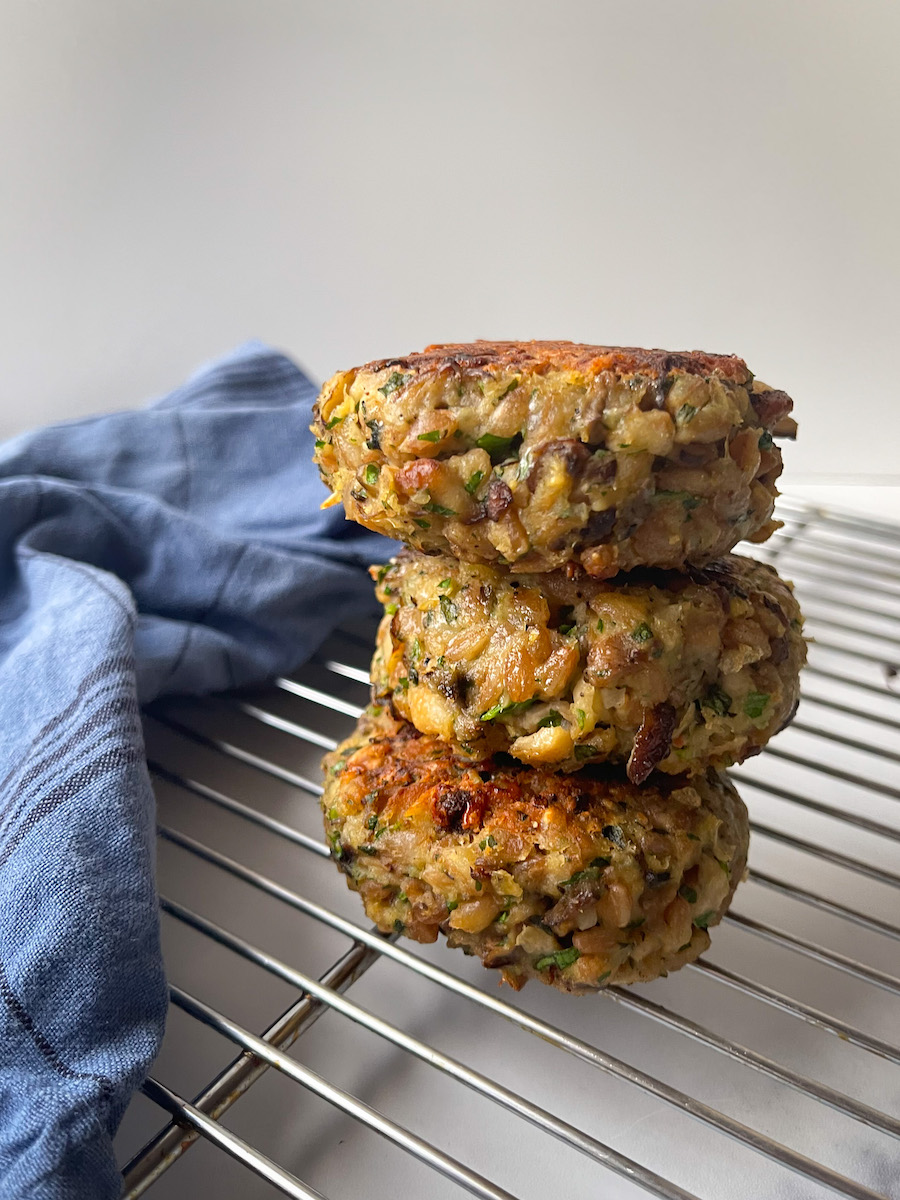
I put a good amount of thought into what to title this recipe and the best I could come up with is… Wild Mushroom and Farro Veggie Patties. Hmmm. What would be better? Veggie burgers? Too hippy-dippy / health food-y. Croquettes? Too dated. So “patties” it is, which I’m guessing still doesn’t have you running to the kitchen.

I hope you look beyond what we’re calling these here and see the potential for deliciousness in the recipe – earthy mushrooms and chewy farro bound together with satisfying cannellini beans and amped up with plenty of garlic, shallot, fresh herbs and parmesan.

Serving Suggestions

You could absolutely serve these Wild Mushroom and Farro Veggie Patties as you would a traditional burger, layered between a bun or english muffin with all the fixings. But they are also the perfect vegetarian topper to a hearty salad – something like this caesar-ish kale and roasted broccoli salad or this kale and brussels sprout number – or served simply with a roasted vegetable.

While I haven’t tried it yet, I’m also guessing you could make these vegan by trading the parm for a vegan cheese or nutritional yeast and the egg with a flax egg or aquafaba. If you do that, report back below and let us know how it went.

I hope you enjoy these as much as I do and make this recipe yours. If you do, leave a review, snap a picture and tag me on Instagram @whatweeat.nyc.

Happy cooking!

WILD MUSHROOM AND FARRO PATTIES

Ingredients
  • 1 Tbsp butter
  • 1 Tbsp olive oil (plus more for cooking patties)
  • 3 cups finely chopped mushrooms, ~1 lb (use the best you can get your hands on – I used a combination of maitake and shiitake)
  • 1 medium shallot, minced (~3 tbsp)
  • 2 garlic cloves, minced (~2 tsp)
  • 1 14-16 oz can cannellini beans, drained
  • 2 cups cooked farro (equivalent to generous cup uncooked farro)
  • 1 packed cup fresh herbs, finely chopped resulting in ~1/3 cup (I used parsley and basil)
  • 1/3 cup finely grated parm
  • 1 egg
  • Kosher salt and black pepper to taste (you’ll probably need around 1 tsp salt)
Method
  1. Melt the butter and oil in a saute pan over medium-high heat and add the finely chopped mushrooms. Stir so the mushrooms are evenly coated with the fat then leave undisturbed until mushrooms begin to release their liquid, then begin to brown on their undersides, ~5 minutes. Give a good stir, then leave alone to continue browning on second side, ~5 minutes more. Finely, add in the minced shallot and garlic and season generously with salt and freshly ground black pepper. Saute for another ~3 minutes to take the raw edge off of the shallot and garlic. Remove from heat and cool slightly.
  2. Meanwhile, roughly mash the drained cannellini beans in the bottom of the mixing bowl. Most of the beans should be broken up, almost like very roughly mashed potatoes (see picture above). Add in the cooked farro, chopped herbs, parmesan, cooled mushroom mixture and 1/2 tsp kosher salt. Mix thoroughly then taste for seasoning. Adjust with more salt and black pepper if necessary.
  3. Once you are happy with the taste, crack in the egg and work it into the mix with your hands. The mixture should hold together relatively well when shaped into a ball.
  4. Shape into 8-9 patties, each with ~1/3 cup of the mixture. I used a measuring cup to help me portion these. Place on plate or sheet pan, cover snugly with saran wrap and refrigerate for at least an hour so that the mixture has time to hydrate. This help them hold together when frying.
  5. To cook: Return cleaned skillet to stovetop over medium heat and coat bottom with olive oil. Cook the patties for ~4-6 minutes a side until nicely golden.
  6. Enjoy!

Serves 4 (each person having 2 patties)

Smoky Marinated and Seared Tempeh


If our small team of four is representative of the larger population, tempeh is polarizing. Team tempeh: Laura and Rian. Team “Oh my God what’s wrong with you”: Char and Gillian.

My case here? You should find out which team you’re on.

Okay, okay, I acknowledge that opener probably doesn’t inspire you to sprint out to the market, but, truly, I love the stuff. Along with eggs, it’s a refrigerator staple chez moi. An unopened packaged has a shelf-life of over a month so the second I use it, I buy another for the next time I need a last-minute protein.

What is tempeh?

Tempeh is a soy-based product made by fermenting cooked soybeans and then forming the mixture into a firm, dense cake. Unlike tofu which is soft and uniform in texture, tempeh has a bit more integrity and chew. That’s because tofu is made from soy milk while tempeh is made from soybeans. It has 16 grams of protein per 3 ounce serving, the equivalent of 3 ounces of salmon.

What does it taste like?

On its own, tempeh has a savory, nutty flavor. But like many other soy-based products, it’s a bit of a chameleon, easily taking on the flavor of whatever marinade or seasoning it meets.  My guess is that strong negative reactions come from the fermented smell of a freshly opened package, which some of us notice and others don’t. Maybe it’s a bit like cilantro where some people are overwhelmed by a soapy flavor, while others can’t get enough.

How can you use it?

Tempeh is often used in sandwiches, chilis, tacos, or enjoyed on its own. You can prepare it any which way but I strongly believe that it’s best thinly sliced and seared until crispy. For your first experiment, try the recipe I’m sharing below. Then branch out and give these recipes a try:

Smoky Marinated and Seared Tempeh

This is my go-to recipe. I use the crispy tempeh strips to top salads, grain bowls and sandwiches. I particularly love it over a salad of roasted carrots and creamy avocado with fistfuls of cilantro, mint and sliced scallion, toasted pepitas and agave-lime vinaigrette. It also makes a good stand-in for bacon in a traditional BLAT (A stands for avocado of course). Try it and let us know which team you’re on!

Ingredients

  • 1 8-oz block tempeh (Lightlife’s Organic Soy Tempeh, seems to be ubiquitous)
  • ½-1 lime, juiced (if extra juicy, ½ should do)
  • 1 tablespoon soy sauce or tamari
  • 1/2 teaspoon toasted sesame oil
  • 1 heaping teaspoon smoked paprika
  • 2 teaspoons maple syrup
  • 1 small clove garlic, grated on a mandoline or finely minced
  • Sriracha to taste (1+ teaspoon)
  • Neutral oil like vegetable, canola or grapeseed

Method

Thinly slice the tempeh into ¼ inch slabs. In a container that snugly fits the sliced tempeh in a single layer, whisk together the juice of ½-1 lime, 1 tbsp soy sauce, ½ tsp toasted sesame oil, 1 heaping tsp smoked paprika, 2 tsps maple syrup, 1 small clove grated garlic and sriracha to taste. Add the tempeh and marinate refrigerated for at least an hour and up to a couple of days.

When ready to use, preheat a large cast iron or non-stick skillet over medium high heat. When hot, add about a tbsp of neutral oil. Then add the drained marinated tempeh in a single layer and sear for ~4 minutes a side. Watch it closely because the maple syrup helps the tempeh caramelize quickly. You want it to be nice and crunchy. Err on the side of too brown versus too pale.

Enjoy immediately or let cool and enjoy at room temperature in salads, sandwiches, tacos…the world is your oyster!

2-3 servings

How To Make Homemade Sushi

One of my favorite things about cooking is playing with my food. Composing a salad, the perfect toast or (in this case) sushi, allows me to have fun each step of the way!  For some, making your own sushi can sound daunting, but it’s actually simple. You don’t even need a sushi mat to make it (although it helps).

In this recipe, I made a vegan sweet potato and avocado sushi roll. Sushi is versatile, so play up your favorite flavor combinations! For the gals at What We Eat, we constantly make many variations of a carrot and avocado salad. So, in light of that inspiration, here is what we came up with! 

What you’ll need:

A clean dish towel

Plastic wrap

A bowl of cold water (to help the rice not stick to your hands)

Sushi mat 

Ingredients

Nori sheets

2 cups sushi rice, cooked and cooled with a splash of seasoned rice vinegar 

Julienned Vegetables of choice (I did sweet potato, cucumber, daikon, avocado, cilantro)

Method:

  1. Place a big square of plastic wrap on top of a sushi mat and place on top of a dish towel. (The towel is there to help with the mess). Place a single piece of nori on top of the plastic.

2. With wet hands, place a decent size scoop of the rice onto the nori and press down until even thickness throughout. The water will help the sushi rice to not stick to your hands. Life hack!

3. Add vegetables of choice in a straight line about ⅓ of the way in. Sprinkle with a bit of salt and top with cilantro.

4. Now the fun part! Using the sushi mat and plastic as a guide, tightly roll the sushi. Make sure the pressure is even when you roll to help prevent lumps. (Note: Chef hands in dire need of a paraffin treatment!!)

5. Allow to sit for 10 minutes rolled in the plastic before cutting.

6. Slice sushi into 8 pieces and enjoy dipped in your favorite sauce.

With Love,

Rian