All You Need to Know About Pork Tenderloin

Currently sitting at my favorite neighborhood patisserie – nibbling on the best chocolate almond croissant in Park Slope (Colson at the corner of 9th and 6th ave) – piecing together the clips of my first totally solo video project. And it’s starting to feel like a mining operation: pealing away the jumbled parts of my 3-hour, single-take, cut-less footage and jerky tripod adjustments – a testament to the importance of asking for an extra set of hands. However, my favorite part of this whole process of making these videos has been the challenge of putting my film schooling to practice in this new food video domain. It’s not perfect and my standards are much too high but it’s really fun. I love the process of demonstrating a process. Food is a process. It’s practice and it’s putting your knowledge of ingredients and tools to the test. Sometimes it doesn’t turn out the way we envision but when it does the process of getting to that point makes you feel like an expert the next time around. Being confident and accepting the process is the key to success.

This video came about because some folks commented on one of our pork tenderloin Instagram posts, professing their frustration with pan-searing pork and that it never looks like “that”. But, I’ll be honest, neither did mine. It took me a few tries and lots of deep breaths to get it right. Laura and the crew would probably say it was my biggest hurdle. But I’m here to tell you that it is possible! Here are a few tips I picked up in the process 🙂

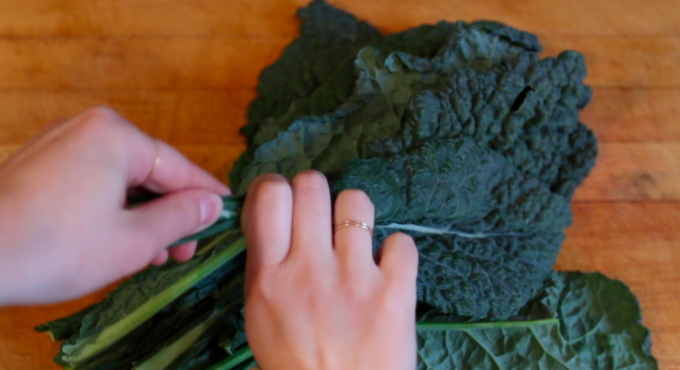
  • Prepping a pork tenderloin:
    • Pork is best seared, to get that crispy, unctuous crust, then popped in the oven at 425 degrees to finish.
    • First, you must trim off something called the “silverskin”. According to my research, “silverskin is connective tissue that doesn’t dissolve when the tenderloin is cooked, so it needs to be trimmed away” (finecooking.com). Hold it tightly with your fingertips and stick a sharp knife, preferably a boning knife or pairing knife, through to make a thin slit and follow the tissue until it’s removed.

  • The longer you marinate, the better.
    • Next, it’s important to marinate the tenderloin for as long as possible, at least an hour. Although, we all know apple and pork is a winning combo, pork is also great with almost any citrus. Pork absorbs flavors beautifully. You can adjust your seasonings to go along with whatever you’re making.
    • Make sure you strip the pork of excess marinade before you start searing but don’t pour it down the drain just yet! You’ll use it later. You can also add a little something extra to the marinade after you’ve stripped it like honey or agave, sriracha, anything that is likely to burn in the pan while it sears. We added honey to the recipe in this video and created a sweet glaze.
    • (Bonus tip: you can also make extra marinade before you add the pork to use as salad dressing!)

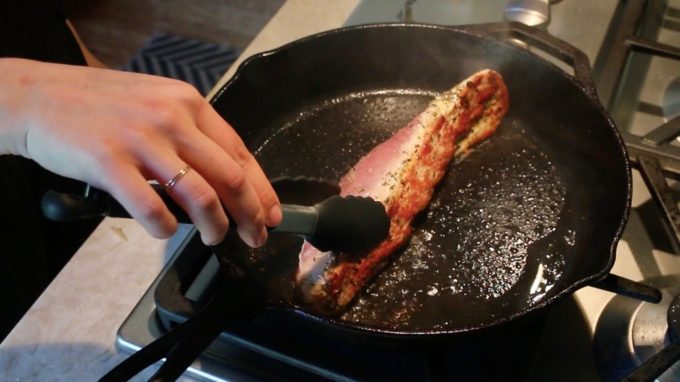
  • How to get the perfect sear every time:
    • When you’re searing pork, or anything for that matter, you want to make sure your pan is really really hot. You can test this with the water splash test, if it sizzles you’re ready to go. Add the oil. This can be anything you have laying around but if you’re getting really technical, you’ll want something with a “high-smoke-point” (things like grapeseed oil, safflower oil or canola oil). Make sure it covers the whole surface of the pan, then carefully layer the meat on top. It will splatter so watch out!
    • You’re going to create an even sear around the whole tenderloin so it’s crispy all the way around. To do this, you’ll roll the pork toward (or away) from you, allowing the pork to get a nice sear on each roll. On the last roll just turn, spread with your excess marinade or glaze and pop it in the oven.

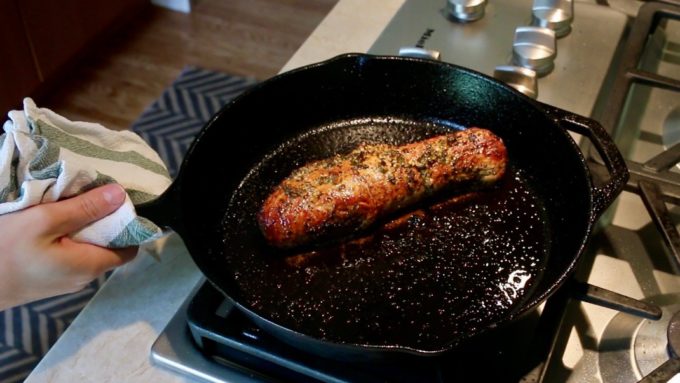
  • Finish it off in the oven.
    • Oven timing is tricky here because oven temps vary, pork girth vary, and different pans transfer heat differently. Before you give up, there’s an easy solution. Welcome meat thermometer! Check the pork after about 6-8 minutes. Stick the thermometer in the thickest park of the meat. You want it to read 135-140. It will finish cooking while it settles.
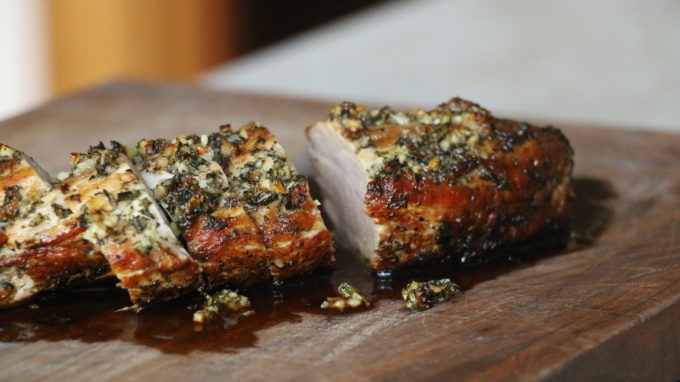
  • Let it rest!
    • Probably the most important tip we can give you is to let it rest. Make sure the pork rests for at least 10 minutes – just enough time to whip up your salad or strain your rice. This will ensure juicy pork. Even if you think you overcooked it, it will still be delicious and juicy if you allow the meat to rest.
  • Save le jus.
    • The final tip I have is to pour the juices that pool on your cutting board over the meat. It’s a trick I learned long ago and will never serve meat to another living soul without it. Perhaps the simplest way to transform a piece of meat into a savory chef-d’oeuvre.

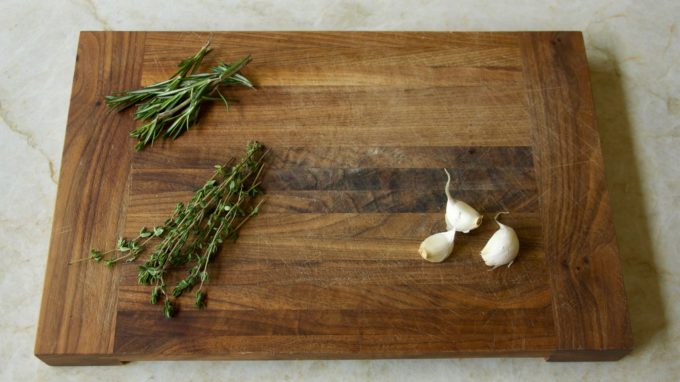
Our go-to pork marinade ingredients and pairings:

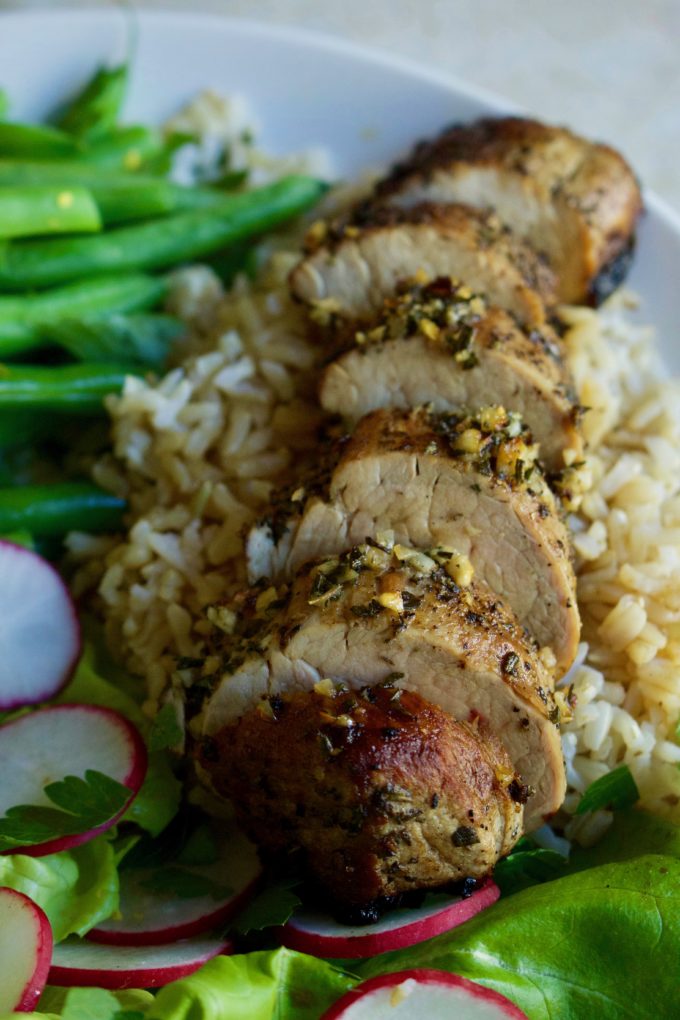
As shown in the video:

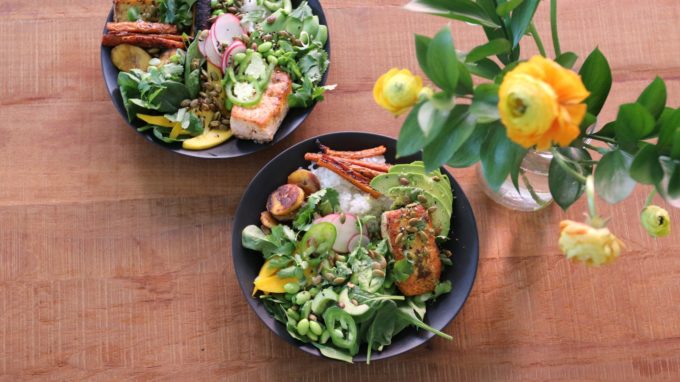
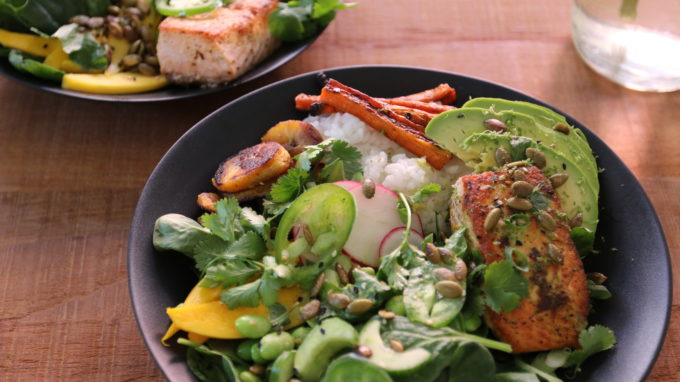
  • Roasted pork tenderloin with lots of fresh thyme, rosemary, garlic, salt + pepper and honey to finish.
    • Paired with delicate Boston lettuce, shaved radish, lightly blanched green beans, and brown rice with a lemon-dijon vinaigrette
  • Roasted pork tenderloin with orange zest, garlic, grainy Dijon mustard and honey to finish
    • Paired with roasted sweet potato wedges, quinoa and simple arugula salad with citrus Dijon vinaigrette
  • Laura’s Cooks vs. Cons pork tenderloin: http://whatweeat.nyc/cooks-vs-cons-behind-the-scenes/

BYO Hawaiian Bowls

Vegetarian? Vegan? Gluten Free? Nut allergy? Onion phobia? These days being a private chef can be challenging. Each week we work hard to dish out new and inspired menus while keeping careful track of everyone’s allergies, intolerances and preferences. It’s not easy and our build-your-own-bowls have quickly become our saving grace and inadvertently our biggest sensations. We prep all the components into separate serve-ware, giving our clients full reign. It’s up to them to decide what they’re in the mood for and don’t think we’re not curious. We really envy that fly on the wall. I mean, it must be kind of crazy coming home to a counter full of mise-en-place and not know what the chef envisioned for the end result. BYO night resembles a quintessential taco night (always my favorite dinner growing up) with all the fixings laid out for you to pick and choose.

Obviously, we know what we would do and it takes all the strength in the world to keep from sprinkling the herbs in with the salad or smearing the garlicky yogurt on the bottom of the platter. We also know it’s true that this is your meal at the end of the day and maybe you had cheese for lunch or you’re just not feeling that tahini drizzle on your sweet potatoes. By far the best news we get is when one of our client’s kids changes their mind about salmon or roasted carrots and I have to think that the BYO is responsible for these little victories.

We also have to think that maybe our clients want some direction. I know from my own life that my BYO dinners usually turn into a show and tell. My boyfriend will say, “I want to see how you do it”. And I can’t tell you how many times I’ve explained a menu to a friend or family member forgetting that BYO isn’t a commonplace acronym. Prompting my third recipe-video, I wanted to show how I would construct my own bowl for our clients who are used to this lingo and also respond to the BYO quarries I get from everyone else. We gathered at Laura’s for our usual Friday staff lunch and spent the afternoon prepping ingredients like we would for our clients. Then, with cameras rolling, I constructed my bowl.

A behind-the-scenes look at the BYO Hawaiian Bowl shoot

This bowl, in particular, was taken from one of our weekly menus and happened to be an experiment. As chefs, we’re constantly on the hunt for unique ingredients to broaden our directory of ingredients and culinary repertoire and plantains were one such, exotic thing that sparked our curiosity. It was the first week we had our first glimpse of spring and we were all craving something light and tropical (or maybe a vacation :)). This bowl was the brainchild of our chief menu strategist, Rian, and, lets be honest, no one doubted it’s viability. In the end in was fun to built our own bowls and admire each other’s different plated creations, not to mention walk in our clients shoes for an afternoon.

By far the best part about BYOs is the versatility. If the store doesn’t have mangos, pineapple would make a great substitute. The opportunities for experimentation and adaptability are endless. This is the first BYO video, but it’s certainly not the last. Stay tuned for more BYO demos!

With love, Charlotte.

BYO Hawaiian Bowls (as they appear in the video):

Sticky sushi rice, baby spinach, crispy pan-fried salmon (alt: pan fried tofu or pork carnitas), pan seared plantains, roasted carrots, sliced mango, shaved radish, cucumber moons, blanched edamame, sliced avocado, scallions + cilantro, mandolined jalapeños, tangy cilantro-coconut dressing, toasted sesame seeds (black and white) + pepitas and lime zest

Some other recent BYO favorites that might peak your interest:

BYO Super Green Spring Bowls

Fried or poached eggs, boston + butter lettuce, farro, quartered radish, blanched peas, blanched asparagus, blanched sugar snaps, avocado, cucumber moons, toasted hazelnuts, whipped feta, scallions + basil + mint and lemon + thyme vinaigrette

BYO Steak Cobb Salad Bowls

Seared and sliced steak of choice, brown rice, crumbled bacon, romaine+watercress+endive, cherry tomatoes, avocado, pickled red onion, radish, crumbled blue cheese, hard boiled eggs, crispy chickpeas, roasted sunchokes (also called Jerusalem artichokes – http://whatweeat.nyc/jerusalem-artichokes/), cucumber moons, parsley + chives and red wine-dijon vinaigrette

BYO Glazed Korean Meatball Bowls

Korean glazed meatballs (alt. tofu), butter lettuce, brown rice, roasted shiitake mushrooms, sauteed baby bok choy, blanched broccolini, avocado, cucumber, toasted black and white sesame seeds, scallions + cilantro, ginger dressing)

BYO Honey-Dijon Roasted Pork Tenderloin Bowls

Fluffy quinoa, thinly sliced apples, roasted sweet potato cubes, arugula + baby spinach, dried cranberries, cucumber, avocado, goat cheese, mint, toasted slivered almonds, apple cider vinaigrette

Feel free to ask about any of these recipes or preparations in the comments section!

How to Prep Kale

Someone once told me you have to soak kale for an hour and allow it to dry out on a kitchen towel for another hour before chopping it, which is why I spent many years avoiding it. Ordering kale in restaurants felt like such a luxury. Since then I’ve obviously done a little more research and that method has since been debunked, however there was definitely a time in my life when I thought prepping kale was a ridiculously arduous task. This got me thinking; what if other people had received similarly faulty and perplexing information about kale prep and perhaps this was why our clients often ask for extra prepped kale? So, today, we’re here to demystify the steps to perfectly prepped kale. And I promise it’s not as complicated as you’re making it out to be.

The things I’ve learned about prepping kale: buy a salad spinner, the stems are not really edible (unless you cook them or chop them finely), roll the leaves up like a sushi roll or burrito, slice it as thin as possible and massage it just a little with some oil and salt or extra vinaigrette.

It’s no surprise that kale is one of our favorite greens, not only for it’s health benefits but it’s heartiness as well. Prepped kale is a great option for people that like to keep things in their fridge all week. Our team preps it out and uses it as the last salad on our client’s weekly menus because it stays green and crunchy for a long time, sometimes as long as a week and a half. But if you’ve eaten a bad batch of kale you know that there’s nothing worse than getting a solid chunk of stem in your mouth. This is why kale prep is important.


To de-stem kale, hold the kale stem with one hand and strip the greens with the other. Next, lay the kale flat on your cutting board with with the tip facing you. Roll it up from front to back and hold it in place with one hand. With your knife slice the kale thinly in one fluid motion without sawing at the greens (in chef terms this is called a chiffonade).

Next it’s time to rinse. Kale is one of the dirtiest greens with lots of nooks and crannies so salad spinners are pretty much a necessity if you want a good clean and don’t feel like spending a good portion of your prep time straining and blotting your greens with paper towels (been there). We like to wash our kale after it’s been stripped and chopped because it’s easier to transport from board to spinner. Be sure not to over handle the kale because it will start to soften and wilt. This is only important if you wish to store your prepped kale in the fridge for as long as possible.

If you’re planning on serving it right away, you’ll probably want to massage it. If you don’t think you’re a fan of kale, it’s probably because you haven’t massaged it. This is a technique for softening kale to make it easier to eat and gives the dressing a better grip. You can do this with a little vinaigrette or a sprinkle of olive oil and a pinch of salt. Don’t get crazy with it, once you feel your kale start to break down stop.

If you’re like me and you hate throwing ingredients away, you’re probably wondering what to do with the leftover stems. These are great chopped up and sautéed in a stir-fry or frittata. Making a soup? Add it in with your onion, celery, etc. for a little extra crunch.

For this video we used lacinato kale (dinosaur kale or Tuscan kale) but you can use with technique for any variety of kale. You can also use this technique when you’re prepping chard or collards.

Once you’ve mastered your prep, here are a few of our favorite kale salads. Hope this how-to opens you up to a world of delicious-kale-salad-possibility!

With love, Charlotte

  • Kale Salad with Pecorino and Walnuts – https://smittenkitchen.com/2013/08/kale-salad-with-pecorino-and-walnuts/
  • Kale and Pecorino Salad with Ricotta Salata (we usually swap out crumbled goat cheese for the ricotta salata) – https://smittenkitchen.com/2014/03/kale-and-quinoa-salad-with-ricotta-salata/
  • Raw Tuscan Kale Salad (add avo) – http://www.101cookbooks.com/archives/raw-tuscan-kale-salad-recipe.html
  • Kale Market Salad – http://www.101cookbooks.com/archives/kale-market-salad-recipe.html
  • Northern Spy’s Kale Salad (a good “gateway” kale salad with all of that cheese!) – https://food52.com/recipes/15584-northern-spy-s-kale-salad
  • Lamon-Garlic Kale Salad (add avo) – https://cooking.nytimes.com/recipes/1015707-lemon-garlic-kale-salad
  • Kale Salad with Dates, Parmesan and Almonds (make extra vinaigrette) – http://www.epicurious.com/recipes/food/views/kale-salad-with-dates-parmesan-and-almonds-51137020


Easiest Vinaigrette Ever!

It’s a mystery to me why people still buy salad dressing. There are certain conveniences that make sense (dried pasta, canned beans, etc.) because they are inexpensive and good. Bottled salad dressings aren’t one of them. They are pricey and artificial tasting.  Sure it’s a time saver, but what if I said you could make a really simple one with stuff you probably already have in 60 seconds or less?! Honor your carefully washed greens and meticulously sliced veggies with a freshly made dressing. Our clients ask us all the time for our vinaigrette recipes and to tell you the truth they’re usually something we whip up without even thinking… or measuring. The real secret is in the jar.

You can make nearly any vinaigrette your heart desires with a jar (reused jam-jars are a great stand-in). The only thing you have to remember is the 2:1 ratio. Two-parts oil to one-part acid.  Measure the acid first. In this case we used a lemon but you can use any kind of vinegar (i.e. red-wine vinegar, balsamic vinegar.. etc.) or citrus you like. Then just double that amount with oil (we like extra-virgin olive oil). Suddenly we’ve transported you back to your 3rd-grade science lab when you learned about emulsification because you’ll see the separation between acid and oil clearly. This is all the measuring you need. Some may prefer a vinaigrette that’s a little less acidic; if so just add a little more than twice the amount of oil.

We ‘jazzed’ up our lemon-dijon a bit with grainy dijon because YUM and voila: the ultimate vinaigrette stand-by. It’s so sooo easy and it’s something we think everyone should have in their repertoire. See for yourself!

Other favorite combos (play with measurements of all ingredients to taste):

  • Lemon juice, dijon, minced shallot, olive oil, salt, pepper (equally good with cider vinegar, white wine vinegar, sherry vinegar, etc.)
  • Lemon juice, smashed garlic clove with or without smashed anchovy, olive oil, salt, pepper (equally good with red wine vinegar)
  • Orange juice, balsamic, honey, olive oil, salt, pepper
  • Lime juice, agave, olive oil or grapeseed oil, salt, pepper (chopped cilantro and a tiny bit of cayenne is good in here too) – great for salads with Mexican ingredients
  • Lime juice or rice vinegar, toasted sesame oil (just a little bit), soy sauce, chili paste or sriracha, grapeseed oil or water to thin and mellow flavors – great for salad with Asian ingredients

Video: Crispy-Skinned Sea Bass, Roasted Cauliflower and Parsley Knife Pesto

I put this video together last fall with my new, but already deeply cherished friend Meredith Carlin. Meredith heads up the original programming production team for ulive (it’s a rabbit hole of addictiveness…consider yourself warned), so I was beyond lucky to have her guiding me along the process.

It was my first time on camera and, wow, I did not know just how hard it would be. Respect for anyone who has made a career doing it. There is a steep learning curve but I’m already excited to put together another.

For now, I hope this inspires you to get out to your farmer’s market and then into your kitchens. You’re more likely to find asparagus or mushrooms than cauliflower this time of year, but use this technique as your template and vary your veggies according. Let me know how it goes!

xo L

Crispy-Skinned Sea Bass, Roasted Cauliflower and Parsley Knife Pesto

Serves 2, with BIG servings of cauliflower

Ingredients

For cauliflower

  • 1 medium-large head cauliflower (any variety works but try romanesco, cheddar or another specialty variety if it’s available)
  • 2 tablespoons olive oil
  • Salt and pepper to taste
  • For parsley knife pesto
  • ¼ cup toasted almonds
  • 1 garlic clove, minced
  • 1 cup packed parsley
  • Zest of 1 lemon, divided
  • Juice of ½ lemon, saved for the end
  • Salt, pepper and extra virgin olive oil to taste

For sea bass

  • 2 sea bass or trout fillets (If it’s whole, have your fish guy cut it into fillets for you)
  • 1-2 tablespoons Wondra
  • Salt and pepper to taste
  • 1 tablespoon neutral tasting, high heat oil like grapeseed, vegetable or canola oil

Directions

To make the cauliflower:

  1. Preheat the oven to 425-degrees F.
  2. Meanwhile, break the cauliflower into small florets. The largest should be no bigger than a golf ball. Don’t let any cauliflower crumbs go to waste because these will get extra crispy and delicious.
  3. Divide the florets and crumbs between two sheet pans.
  4. Drizzle each pan with 1 tablespoon olive oil and about ¼ teaspoon each salt and pepper. Use your hands to massage the oil, salt and pepper into the cauliflower. You want every nook and cranny to be well-seasoned.
  5. Roast cauliflower in top and bottom third of preheated oven for 30 minutes until very golden brown, tossing the cauliflower and swapping the placement of the pans halfway through.
  6. Let cool on roasting sheets while making knife pesto and crispy sea bass.

To make the knife pesto:

  1. Pile all pesto ingredients – ¼ cup toasted nuts, 1 minced garlic clove, 1 cup packed parsley, and zest of ½ lemon – onto a cutting board. Using a chef’s knife, chop it down together until it is cohesive pesto, but still chunky enough that you can see it contains almonds and parsley. There really is no right or wrong here though, so make it how you think you might like to eat it.
  2. Reserve while making the crispy sea bass.

To make sea bass (or trout) and assemble dish:

  1. Pat fillets very well with paper towels to get them as dry as possible. Using the back of your cleaned chef knife, scrape the skin side of the fillet to remove any excess moisture, wiping your knife with a paper towel after each swipe. This is almost like squeegeeing your fish.
  2. Now that the fish is extra dry, sprinkle it lightly on both sides with salt and pepper. It isn’t a thick piece of fish, so season lightly!
  3. Dust the skin-side of your  fillets heavily with Wondra. Over the sink so you don’t make a mess, blow off any excess Wondra flour.
  4. Place your prepped fish aside while you ready your equipment and finish assembling the roasted cauliflower and parsley knife pesto.
  5. Heat a heavy-bottomed skillet, preferably cast iron over medium-high heat for a few minutes to get it good and hot.
  6. Meanwhile, combine the cauliflower and knife pesto. You can do this on one of the cooled sheet pans to save yourself from needing to clean a separate bowl. Taste and adjust seasoning with salt and pepper if necessary. Feel free to add a drizzle of extra virgin olive oil if it seems dry.
  7. Once fish skillet is hot, add 1 tablespoon of neutral flavored oil and it heat up until it is nearly smoking, about a minute. At this time, add your  fillets, skin side down, pushing down on each  so that the skin makes full contact with the hot pan. (If you don’t do this, it will buckle and not get as crisp.)
  8. Cook for 3 minutes, all the while pushing down gently with your spatula.
  9. After 3 minutes, flip the fillets and turn off the heat and let the fish finish cooking for 20-30 seconds in the pan’s residual heat.
  10. To plate, place one fillet on each of two serving plates and pile high with the roasted cauliflower and knife pesto. Finish by zesting the second half of the lemon between the two and give them both a good squeeze of fresh lemon juice.

Enjoy!